Seven Tips to Enhance Your Mobile Photography
By: Tyler Helms, NC REALTOR® IT Manager
In today’s world, smartphones give us the power to communicate not only in words, but in photos as well. Technology has got us to the point where the camera on your smartphone can act as a legitimate high-quality solution for your photography needs.
 Though the quality does not beat that of a digital camera, mobile photos can work not only for your personal life, but for your business, too. There is, however, an unofficial artistic standard that dictates the use of these photos, especially when it comes to attracting likes or engagement on social media. People don’t want to see low-lit photos of your cat while it’s eating. While that may seem enticing to you, others may not find it so enjoyable and may scroll past your photo on social media channels. So, if you’re trying to post to get likes or stimulate conversation, here are a few tips to enhance your experience as a mobile photographer.
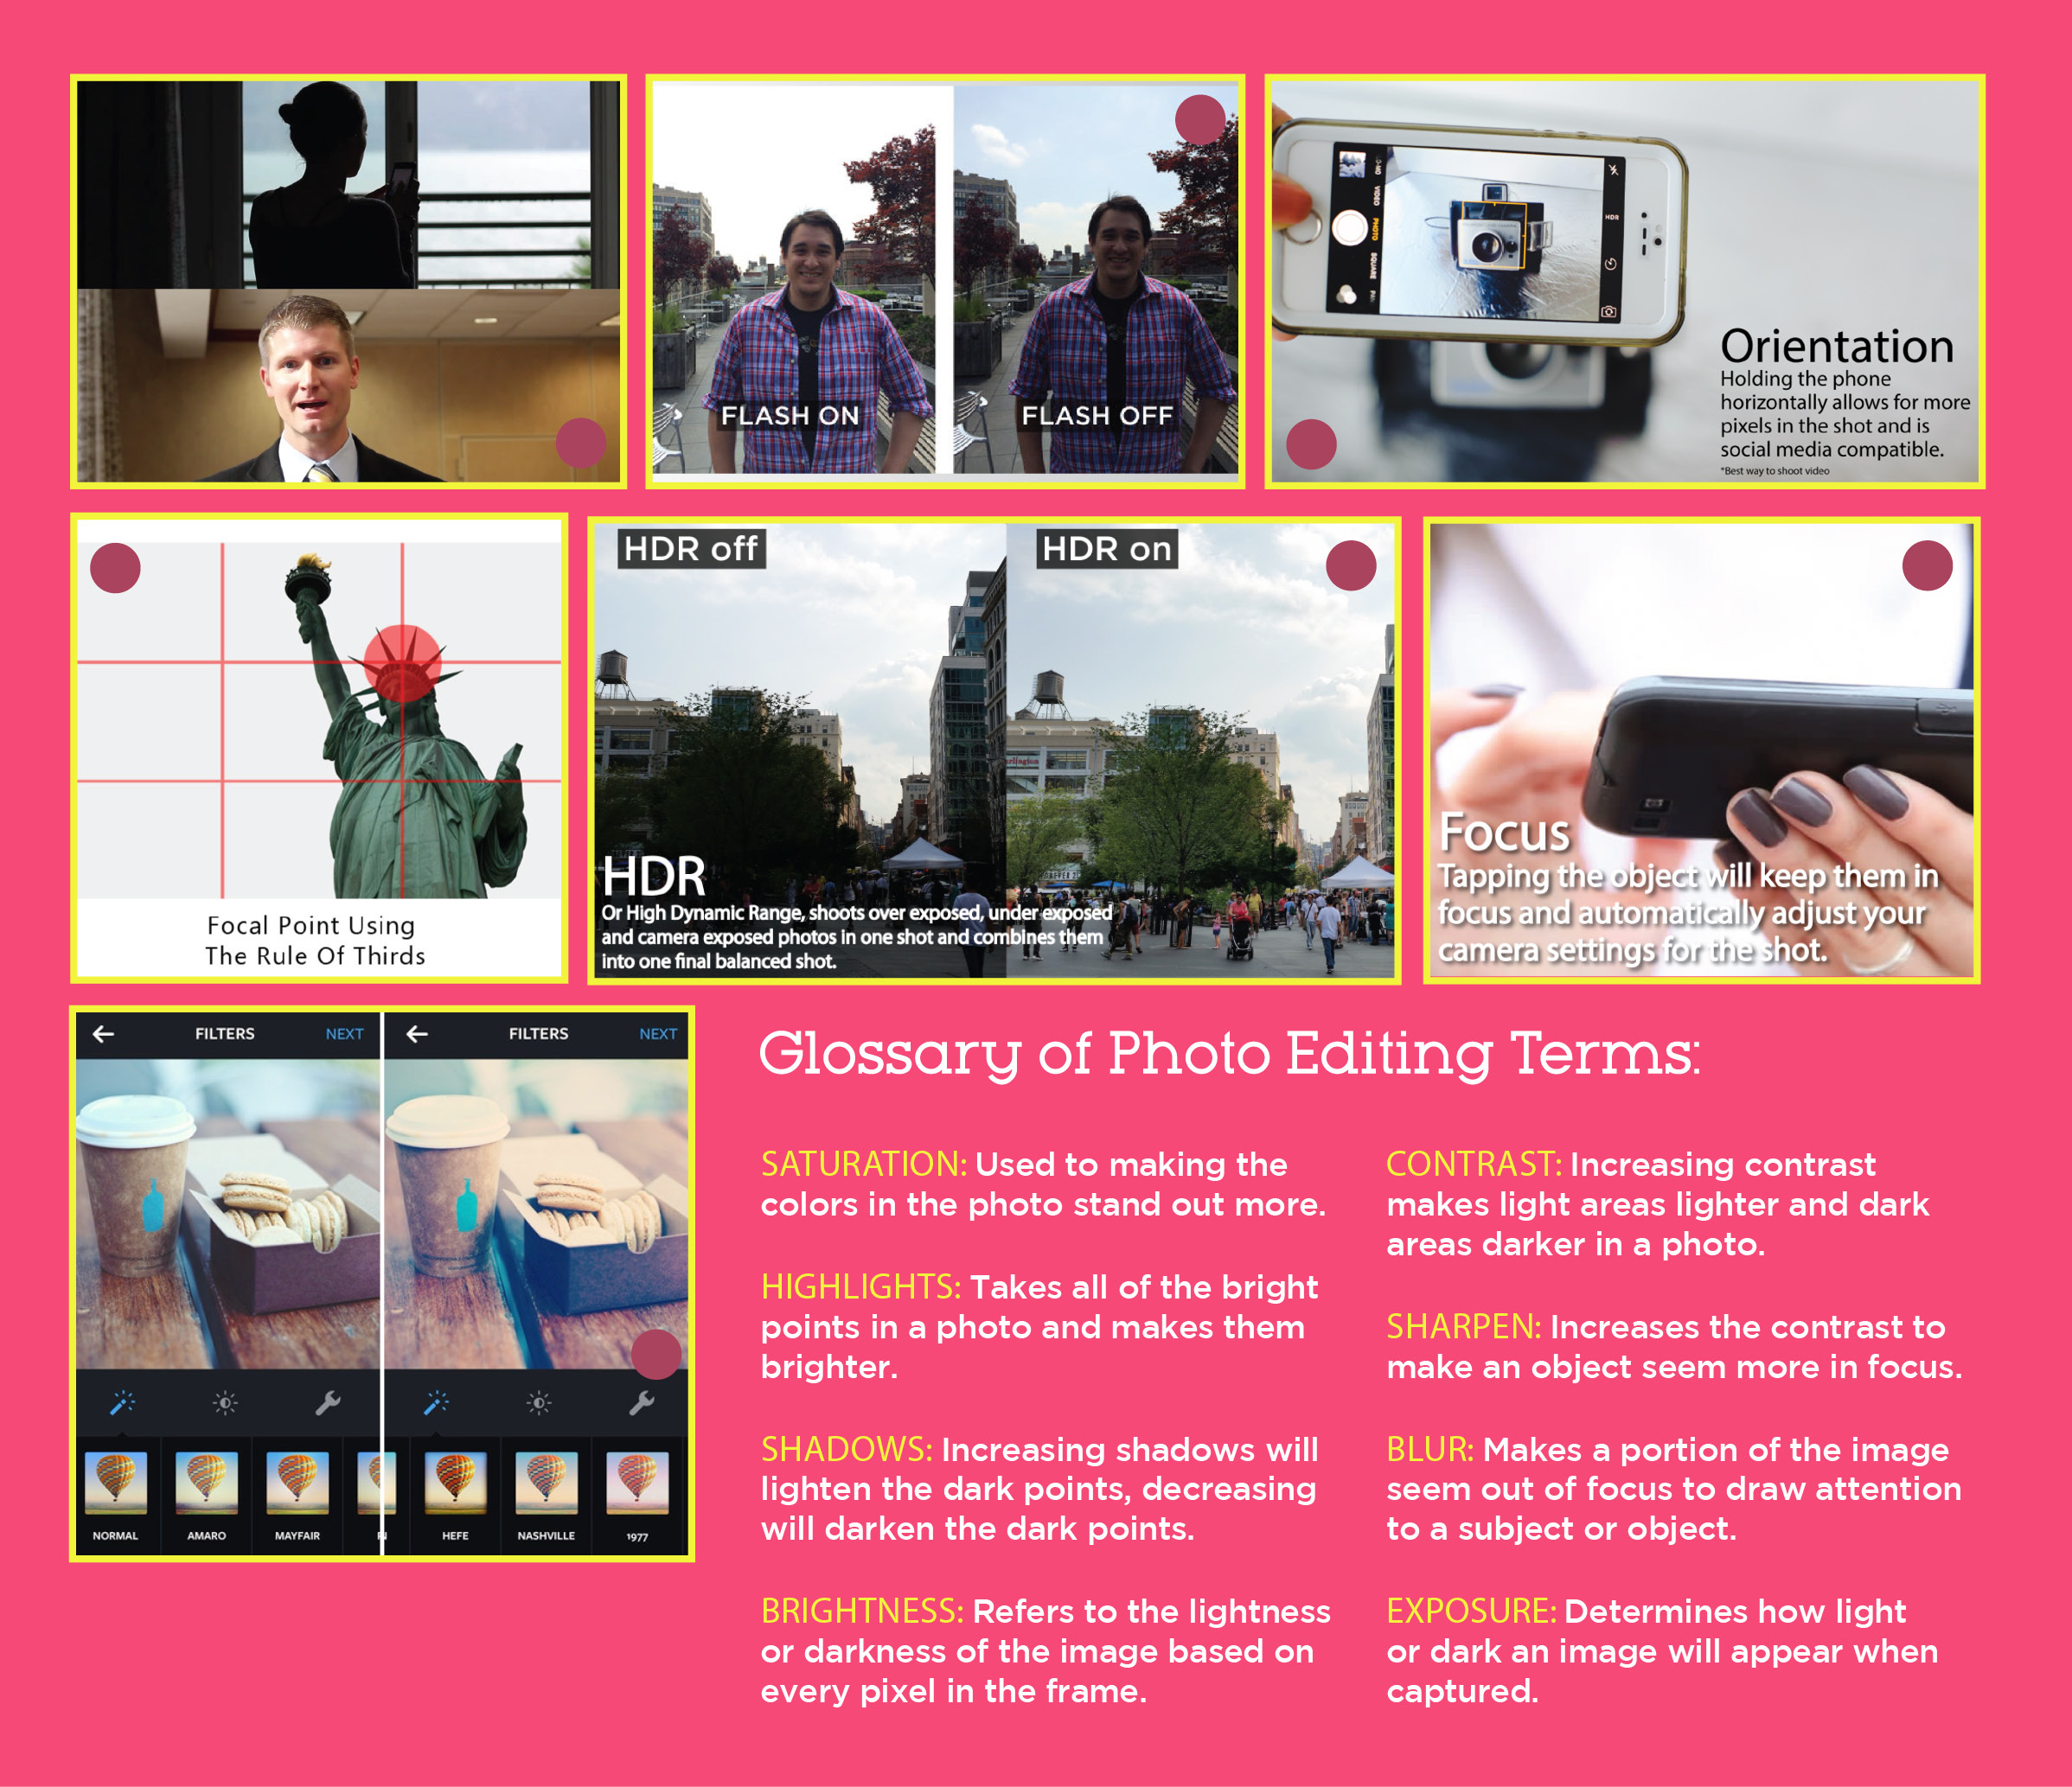
1. Shoot with the light at your back
It’s easy to take lighting for granted when snapping a photo, but a simple tip to shooting somewhere indoors with windows or on a sunny day is to make sure you have your back to the source of the light. This will allow your subject to be more defined and will make it easier for your camera to pick up more colors and details. If you shoot toward the sun or a window, your subject will look more like a silhouette, and their background will be hard to distinguish. It may take some rearranging, but it will be worth it.
2. Use Flash Outside
When shooting outside, make sure the flash setting is turned on. This may seem unnecessary, but when you use the flash, your smartphone camera continuously auto-adjusts its settings to your environment. Think about the conditions of a partly cloudy day. The sun shines for a while and then hides behind the clouds. It’s tough to keep your camera settings consistent in these conditions. However, if you use your flash, you don’t have to worry about adjustments because your mobile camera does the work for you.
3. Shoot horizontally
Because most of us hold our phones vertically to make calls, to text or to utilize an app, we get in a bad habit of taking photos while holding the phone vertically, without really analyzing what we are shooting. But, shooting photos in the landscape mode, or by holding your phone horizontally, gives you a chance to showcase more in your photo. It also gives you more control as you have to use two hands to steady and take the photo.
4. Rule of Thirds
The next time you take a photo, try positioning the subject toward the right or left side of the screen to utilize the “rule of thirds,” or a method in which the subject is lined up on the two outer vertical lines of an even 3×3 grid. Different from a headshot or standard portrait where the subject is centered, the rule of thirds naturally takes your eyes on a journey through the photo. It doesn’t take away from the subject, but rather helps the viewer notice the details around the subject. To turn on the grid, refer to your phone’s camera settings.
5. Turn on HDR for your photos
The HDR, or High Dynamic Range, function is a great tool because it essentially combines three photos into one to create a well-balanced photo. When shooting in HDR, your camera will take an overexposed photo, an underexposed photo and a photo based on the current camera settings. This helps to define the highlights (brightness) and the shadows (darkness) without having to manually adjust your camera settings. The HDR function is available on both iOS and Android devices.
6. Stay focused
This may sound like common sense, but make sure your photos are in focus! There is nothing more annoying than a picture that is blurry or out of focus. Sure, there are ways to professionally manipulate photos that don’t come out just right, but why go to all that trouble when the simple remedy is to focus your photo from the start. To do this on your phone, tap the subject on the screen of your phone and then take your photo. This tapping action identifies what you want to be in focus and then adjusts the exposure of your camera so your subject is well defined.
7. Use a photo editor
Some photos turn out great, some not so great. For those that need to be brightened or need some color adjustments, use a photo editor. Both iOS and Android phones come with photo editing tools through their photo gallery app. Some of the most popular tools used to adjust photos are the highlights, shadows and saturation tools. The highlights and shadows tools help bring out the brighter and darker elements in your photo. The saturation tool helps to adjust the color of your photo; more saturation makes the colors pop in your photo whereas less saturation removes the color intensity and richness. Your ultimate goal will help you determine what adjustments to make.
You can also use photo editing apps like Instagram to help enhance your photos, through premade filters. Remember, especially when posting on social media apps like Instagram, people want to see creative photos that are pleasing to the eye, so use a photo editor to help make your photos stand out, not to distract.
Contact Tyler Helms for more information on how to make mobile photography work for your business.
